High-Quality Potassium Silicate, Sodium Silicate, Lithium Silicate for Global Markets
Okay, here’s the blog post written with a natural flow, avoiding AI traces, using simple language, and following your structure.
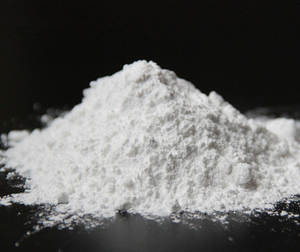
(how to remove sodium silicate)
Sodium Silicate Showdown: Banishing the Sticky Stuff
Sodium silicate. It sounds fancy, maybe like something from a science lab. You might know it better as “water glass” or that super sticky stuff used in factories. It’s useful for many things, like making cement or gluing cardboard boxes together. But sometimes, you get it where you don’t want it. Maybe a spill happened. Maybe you’re working on a project and things got messy. Suddenly, you’re stuck with a hard, glass-like crust that seems impossible to shift. How do you get rid of it? That’s what we’re tackling today. Forget complicated jargon. This guide is about practical steps to remove sodium silicate effectively and safely.
1. What Exactly is Sodium Silicate?
Think of sodium silicate as a kind of glue made from sand and baking soda. Chemists mix silicon dioxide (that’s sand) with sodium carbonate (baking soda) and heat them up. The result is a thick liquid or sometimes a solid chunk. This stuff is amazing at sticking things together and resisting fire. Factories use it heavily. It helps bind foundry sand cores for casting metal. It makes cardboard boxes stronger. It seals concrete surfaces. It’s even used in making soaps and detergents. But its superpower – forming a strong, hard bond – becomes its biggest problem when it lands on the wrong surface. It dries incredibly hard and sticks like nothing else. Understanding what it is helps us figure out how to break it apart.
2. Why Would You Need to Remove Sodium Silicate?
You don’t usually need to remove sodium silicate if it’s doing its job right, like inside a sealed container or bonding materials together. Problems arise when it escapes its intended spot. Accidental spills are a big reason. Picture a drum tipping over in a workshop. That sticky liquid spreads fast and dries even faster. Cleaning tools and equipment after use is another common need. If you leave it on machinery parts, it can gum up the works. Restoration projects often involve removing old sodium silicate coatings or adhesives. Maybe you’re fixing up an old car engine block sealed with it years ago. Perhaps you’re an artist trying to salvage a piece where sodium silicate was used experimentally. Maybe you’re a homeowner who accidentally dripped some sealant on your nice tile floor. The key point is this: sodium silicate is tough stuff. Once it sets, it won’t wash off with simple soap and water. You need specific strategies to defeat it.
3. How Do You Actually Remove This Stubborn Gunk?
Okay, down to business. How do you win this chemical showdown? There’s no single magic bullet. The best method depends on where the sodium silicate is and how thick it is. Let’s look at the main tactics:
Water Attack (For Fresh Spills Only): This is your first and best chance, but it has a short window. If you catch the spill before it dries, act fast. Flush the area with lots and lots of water. Sodium silicate dissolves easily in water when it’s still wet. Keep rinsing until it’s all gone. Don’t let it dry! Once it hardens, water alone won’t cut it.
Acid Power (For Dried Buildup): For the hardened stuff, you need something stronger. Acids work well because they react with the silicate. Common household vinegar (acetic acid) can help with thin layers. Soak a cloth in vinegar and lay it over the dried silicate. Let it sit for a while, maybe 30 minutes to an hour. Then try scraping. For tougher jobs, citric acid (found in lemon juice or as a powder) is stronger and safer than harsher acids. Mix it with water to make a paste or solution and apply it. Muriatic acid (hydrochloric acid) is very effective but also very dangerous. It requires extreme caution, gloves, goggles, and good ventilation. It’s really best for professionals dealing with large concrete surfaces. Always test any acid on a small, hidden area first to make sure it doesn’t damage the surface underneath.
Mechanical Muscle (Scraping and Abrasion): Sometimes, you just need to get physical. For thick layers, especially on metal or concrete, careful scraping with a putty knife or chisel can break off chunks. Be careful not to gouge the surface underneath. For smaller areas or final cleanup, abrasive pads like steel wool can be useful. Sandpaper works too, but it creates dust you don’t want to breathe. Always wear gloves and eye protection when scraping or sanding.
Heat Help (Sometimes Useful): Applying heat can sometimes soften hardened sodium silicate. A heat gun might make thin layers easier to scrape. But be careful. Too much heat can damage some surfaces or even make the silicate harder. It’s not always reliable. Test carefully if you try this.
The Soak Strategy (For Items): If the sodium silicate is on something you can submerge, like a tool or a small part, soaking might work. Use warm water with vinegar or citric acid added. Let it soak for several hours or even overnight. This gives the acid time to work its way in. After soaking, scrub the softened residue off.
Remember, safety first. Always wear gloves and eye protection. Work in a well-ventilated area, especially when using acids. Start gentle and increase the intensity only if needed.
4. Where Might You Use These Removal Methods?
Knowing how to remove sodium silicate is good. Knowing where you might need these skills is even better. Here are some common situations:
Industrial Workshops & Factories: This is ground zero for sodium silicate use. Spills happen. Equipment gets coated. Regular cleanup using water (for fresh messes) or vinegar/citric acid soaks for tools is essential maintenance.
Foundries: Sodium silicate binds sand cores used in metal casting. Removing leftover residue from molds and equipment is crucial. Acid washes or mechanical removal are common here.
Construction Sites: Sodium silicate is used as a concrete sealer or dust proofer. Over-spray on windows, doors, or finished surfaces needs removal. Vinegar or citric acid solutions are often suitable.
Art Studios & Restoration: Artists sometimes use sodium silicate for unique effects or bonding. Conservators restoring old objects might encounter it. Gentle methods like vinegar soaks or careful scraping are vital to avoid damaging valuable items.
Home Garages & DIY Projects: Hobbyists might use sodium silicate for small projects or encounter it in older items. Accidental drips on workbenches or tools require cleanup. Household vinegar is usually safe and effective for these smaller jobs.
The key is matching the removal method to the situation. Use strong acids only where necessary and safe. Opt for gentler methods like vinegar or soaking for smaller projects or delicate surfaces.
5. Sodium Silicate Removal FAQs
Let’s tackle some common questions people have about getting rid of this sticky substance.
Does water dissolve dried sodium silicate? Sadly, no. Water works great on wet sodium silicate. But once it dries and hardens, water won’t dissolve it anymore. You need acids or mechanical methods.
Is vinegar strong enough? Vinegar (acetic acid) is good for light deposits or as a soak. It’s safe and readily available. For thicker, older buildup, citric acid is more effective. Very stubborn deposits might need stronger acids, but use them with caution.
Will removing it damage my floor or tools? It depends on the method and the surface. Acids can etch some materials like marble or polished metal. Always test your chosen method on a small, hidden spot first. Scraping can scratch surfaces if you’re not careful. Be gentle.
Is muriatic acid safe to use? Muriatic acid (hydrochloric acid) is powerful but hazardous. It produces fumes you shouldn’t breathe. It can severely burn skin. Use it only with proper safety gear – gloves, goggles, respirator – and in a very well-ventilated area. Consider it a last resort for professionals dealing with large concrete areas. Citric acid is much safer for most home or workshop uses.
How long does a vinegar soak take? Patience is needed. Soaking times vary. Thin layers might loosen in an hour or two. Thicker deposits could need overnight soaking. Check periodically and gently scrub to see if the residue is softening.

(how to remove sodium silicate)
Can I just paint over it? Painting over sodium silicate residue is usually a bad idea. The paint might not stick well to the smooth, glassy surface. It could peel off later. It’s better to remove the residue properly before painting.
RELATED POSTS

Why is polycarboxylate superplasticizer more suitable for modern concrete?

Potassium Silicate: The Essential Guide for Agriculture, Concrete, and More
how to test sodium silicate levels

Will the recent surge in energy prices in the European Union have an impact on best bhutan tour packages

How to Measure the Quality of Foaming Agents?
